

Creating a new expense report
1. When logging in to KTH-RES, you will see your dashboard and to the right you can see "2 Create expense reports". Click anywhere on the transaction, see yellow marking below:

2. Tick the box and click on the blue button "+ create a new report" to the right.

3. Then you will need to add cost center, project number and approver.
For each step, it is therefore required that you click on the magnifying glass and then search for the correct information that your report should have.
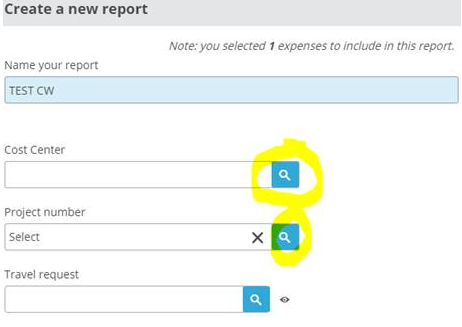
4. Click on the magnifying glass icon for cost center first. If you dont start there you wont be able to search for the project number. Search by writing the name or reference (your four-digit letters). Now you should see a list of choices, click on the one that applies to you.

5. After that you can search for the project number named “task name” or "task code" using the magnifying glass icon, then you can choose the right project number from a list:

6. The next step is to search for your approver by using the magnifying glass icon. Now you should see a list of approvers (if there is more than one), click on the correct approver.

You can also watch a video here , but disregard the comment "your cost center will be added automatically", that does not apply for our school.
The expense report must be printed and all documents must be left or mailed to your travel administrator to receive compensation. Please avoid stapling the documents together if you do not have access to tape (due to rust).