
Create a travel order
This page provides step by step instructions on how to create and complete a travel request.
In order to create a travel order, you must have a traveller profile.
Create/update update your traveller profile (KTH Intranet)
Want to create a travel order on your mobile phone? Download the app!
Create a travel order (step-by-step guide)
1. Log in

- Log in to your page on the intranet.
- Go to the 'Services' tab.
- Click on 'Travel and Expenses (KTH-RES)'.
2. Go to the Egencia booking portal
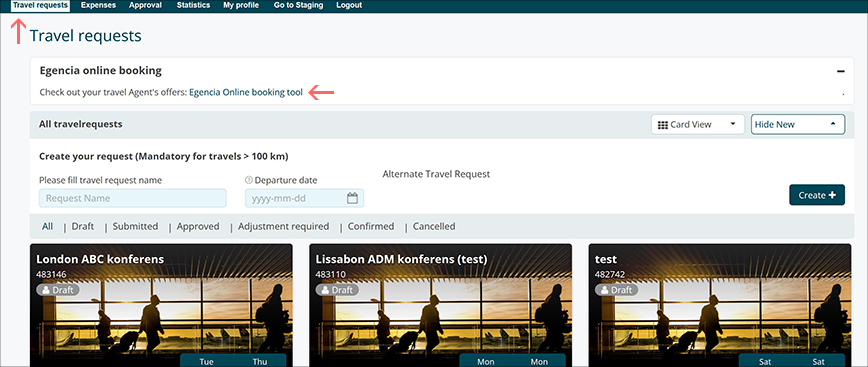
- Go to the 'Travel booking' tab to go to Egencia, the travel agency contracted by KTH.
- Click on the link to Egencia's online booking portal.
3. Get a price quote
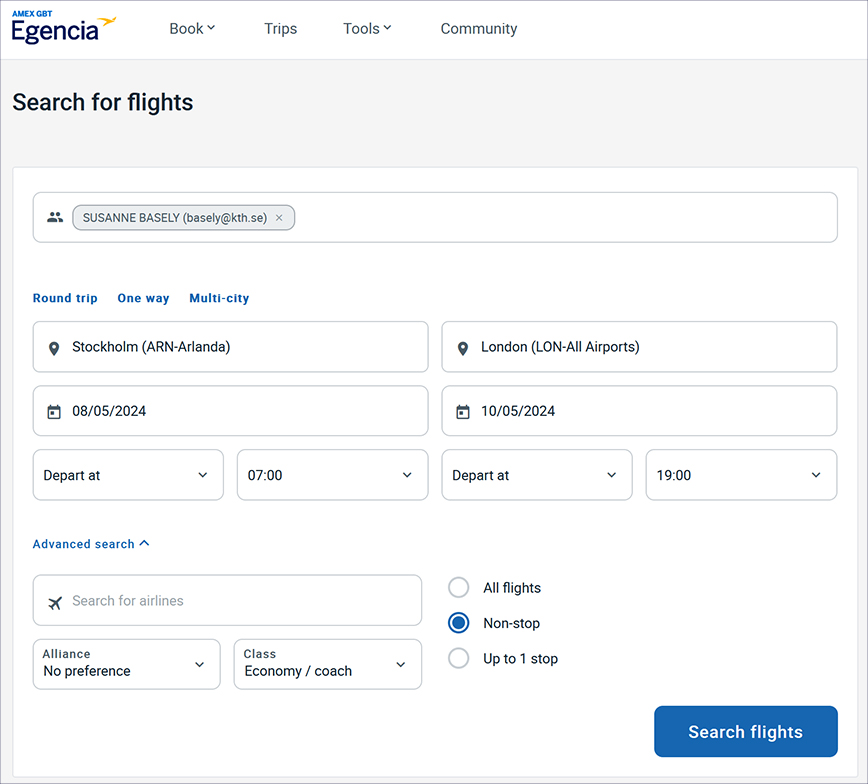
- Choose one of the options: flight, hotel, train or car hire.
- Enter your booking details.
- Click on the 'Search for flight/hotel/train/car' button.
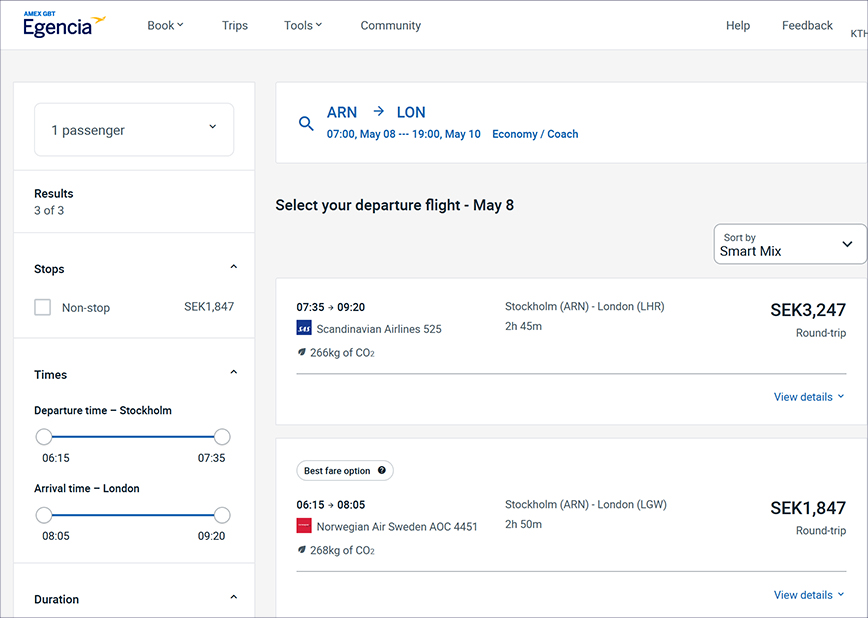
- Select the best price proposal based on KTH's guidelines for meeting and travel.
- You will use the price proposal when you complete your travel order in the next step.
4. Create a travel order
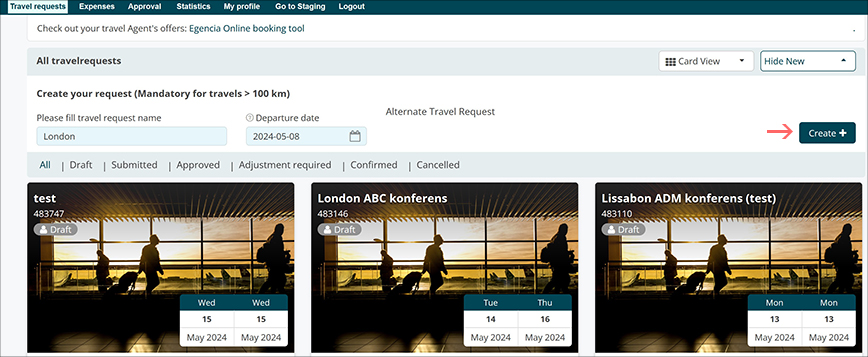
- Select the name and enter the departure date.
- Click on the 'Create' button on the right.
5. Enter the budget

- Complete the 'Budget' field.
- Click on the magnifying glass to the right of the 'Cost Center' field.
6. Enter the cost center code
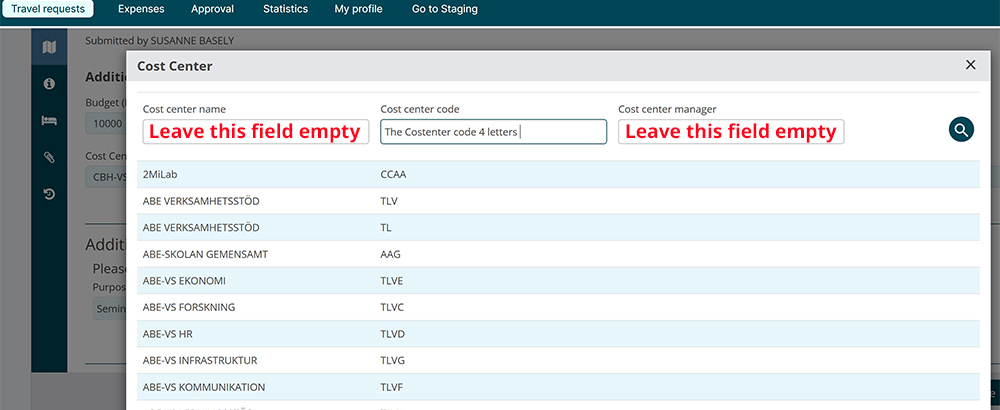
- Enter the name of the cost center organisational unit in the 'Cost center code' field.
- Click the magnifying glass to continue.
7. Select the cost center unit

- Select the correct organisational unit from the list.
- Click on the magnifying glass to go to the next step.
8. Enter the project code
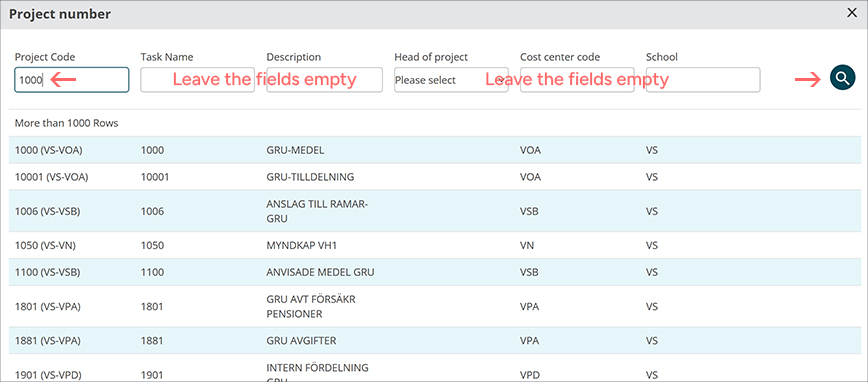
- Enter the project in the 'Project Code' field.
- Click on the magnifying glass.
9. Select project
- Select the correct project from the list.
10. Click on the magnifying glass/approver
- Click on the magnifying glass on the far right to select the approver.
11. Select the approver from the list
- Select the name of the approver from the list.
12. Enter the purpose
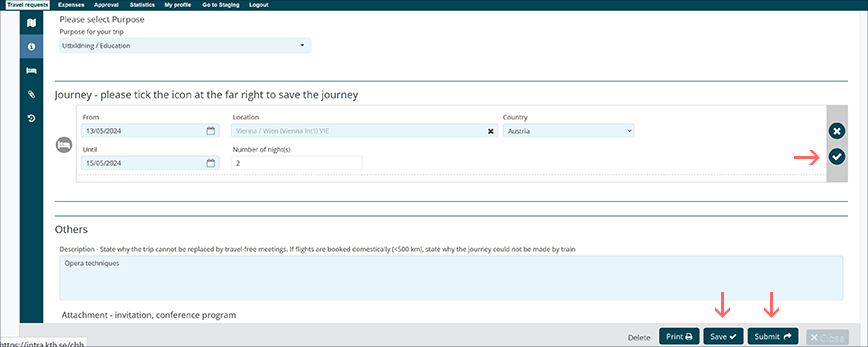
- Select the purpose of the trip from the drop down list.
- Enter the date, location and country.
- Enter any additional information in the 'Others' field and attach any documents.
- Click the tick in the grey box on the right!
- Temporarily save or submit for approval!