Scan using KTH-Print
Quick reference guide to scan documents and send them by e-mail to any address with KTH-Print.
- Log in to the KTH-Print printer with your KTH Access card or manually with username and password.
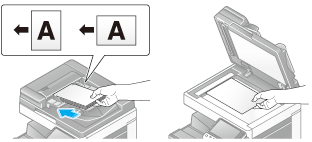
- If you need to scan several pages at once, use the top input tray. If you only need to scan one page, lift the lid of the printer and place the page to be scanned on the glass, with the page to be copied facing down, and the corner of the document aligned with the top left corner of the glass. Close the lid.

- Press Scan/Fax on the printer. On some printer models, the option is available under the Menu-button.

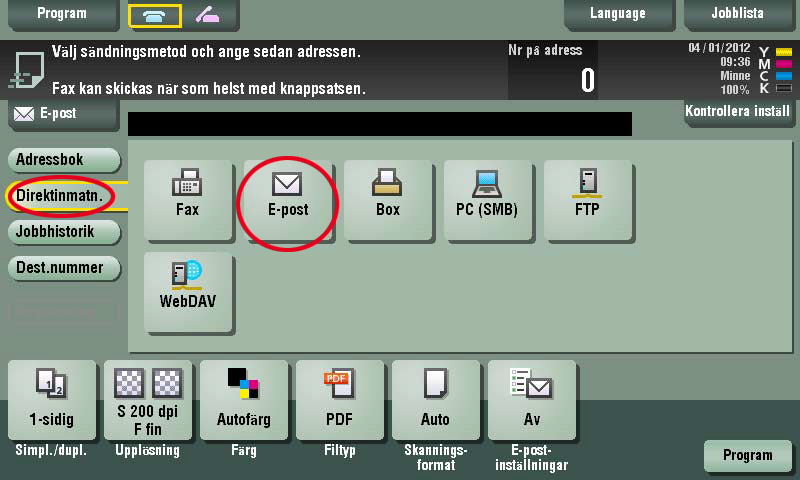
- First tap the menu choice Direct Entry / Direktinmatning (left side of screen) and then tap Mail . If you want to send to your KTH.SE address , you do not need to specify a destination address since you are already logged in (defined as "Me" on the screen).

- Tap "Me" as recipients enter the e-mail address you want to send the document to.
- Select any desired settings (explained in the table below) for the scanning job if the defaults do not suit your needs (the bottom part on the screen).
Scanning Setup
Description / Explanation
Color
Choose BW / color etc.
Simplex/Duplex
Select 2-sided when scanning double-sided documents.
Resolution
Set the resolution / quality of the scan.
The higher the number, the more detailed the pictures will be.
File Type
Select the type of file to be created when you scanned. The following files are supported:
PDF, SPDF, PDF/a, Word, Excel, TIFF, RTF, XPS.
Scanning format
Set the size of the document you are scanning. Useful if you want to scan only a portion of a document.
E-mail settings
Change the file name or e-mail of the subject of e-mail to be sent.
- Press the physical Start button on the printer.

- Scanning of the document begins and is then sent to your chosen recipient. You are all done!
