Booking and Cancellation of a meeting and/or room in Outlook
How to book and cancel booked rooms and meetings using Outlook.
Before you begin
- The booking has to be done in your personal calendar in Outlook
- You are not allowed to make the booking from a shared mailbox
- Even if you try to make a booking in the calendar of the room, it will be done in your personal calendar
- If you need to remove the booking, it has to be done in your personal calendar in Outlook.
Book a meeting and or room
- Open Outlook and click on Calendar
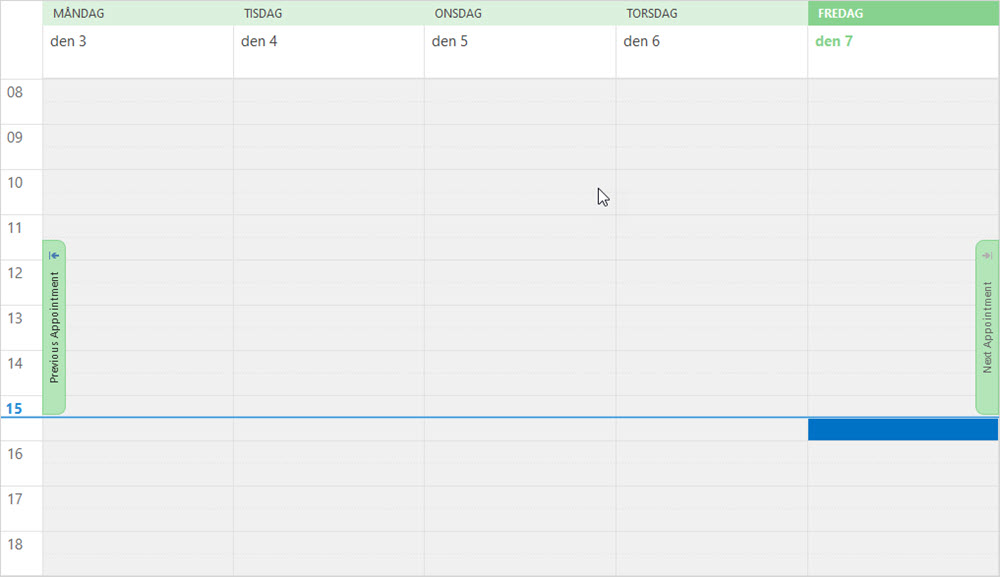
- Double-click at the time you want your meeting
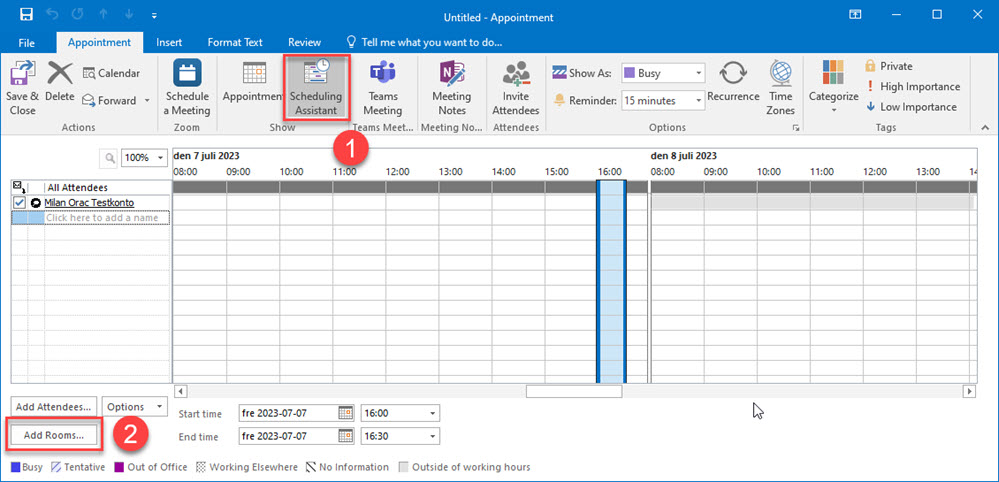
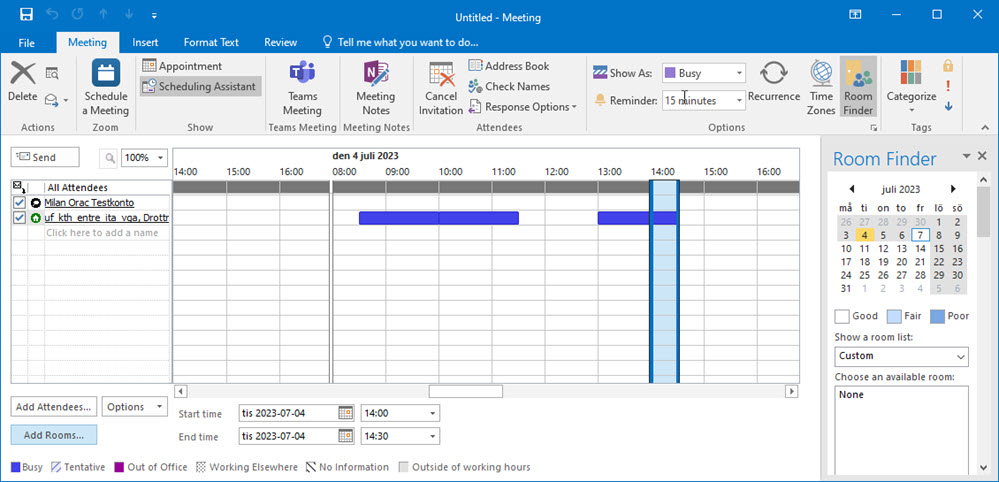
- Click on "Scheduling Assistant" and click on "Add Rooms...". To invite attendees at the same time, click "Add Attendees..."
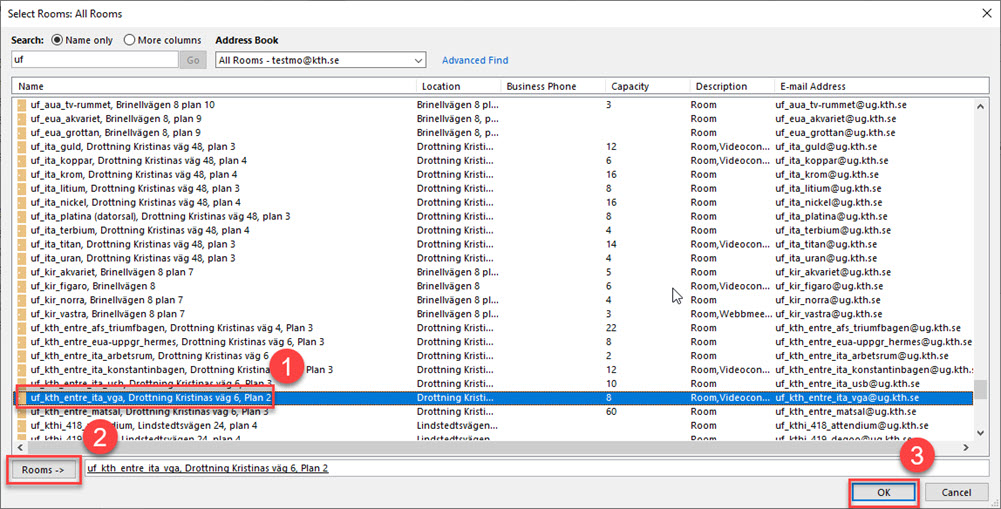
- Type in the name of the room and mark it and click "Rooms"button and then "OK". Same procedure when you add Attendees.
- A colored field, with or without text inside, will show when the participant or the room is occupied with other appointments (until 12:00 in this example). If that is the case, you can choose another date or time. If the booking looks ok, click "Send".
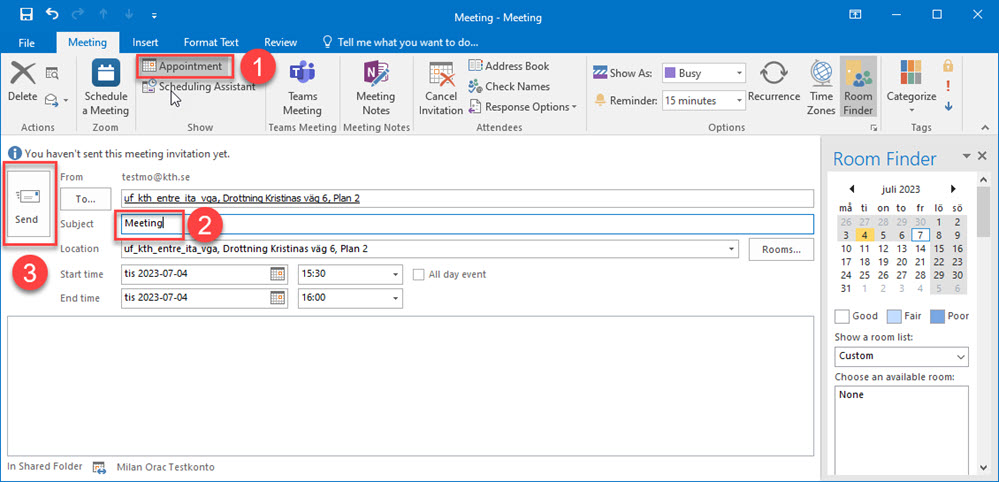
- To not send the booking without the subject, you can click on "Appointment" and then fill in under "Subject" and then you can click on Send.
Important
- You have to receive a notification by e-mail that the booking is accepted. If you don't get that notification, the room is not booked.
- Some room have an approver the has to admit the booking. The room is not booked until admitted.
Cancel a booking
- To cancel the booking of a room, you have to do that in your personal calendar. Choose "Cancel meeting".
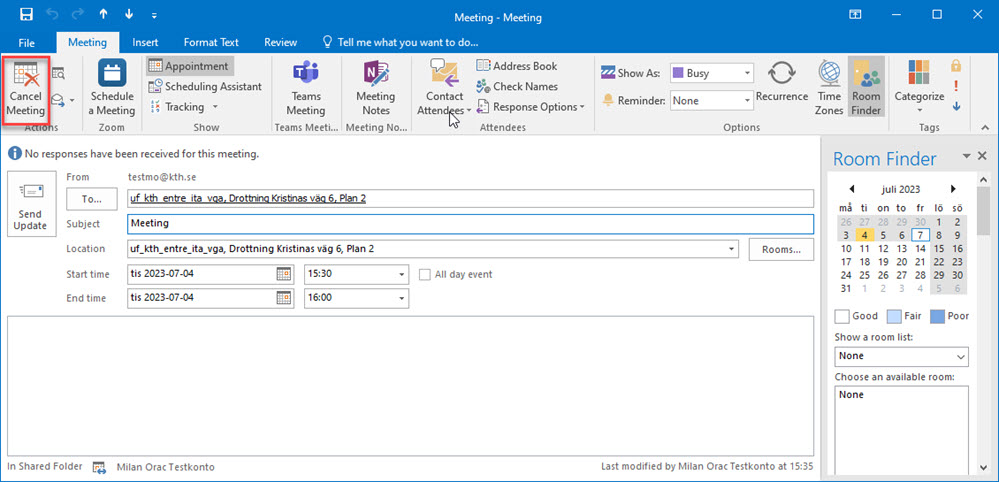
- And send it to all participants, which includes the room. It might take a little while for the booking of the room to disappear.

