
Create an expense report in KTH-Expense
We recommend that you first create an expense report, then register your transactions, which you can easily link to your report.
Create a new expense report
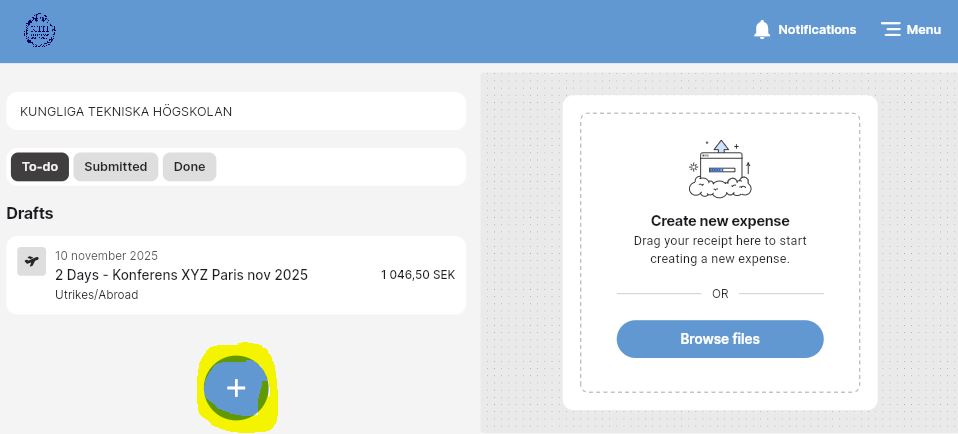
1) On the dashboard, press the “+” icon:
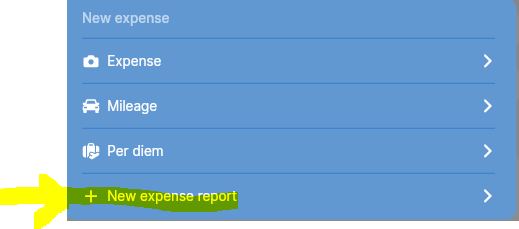
2) Select “+ New expense report”:
3) Fill in the following fields (fields with an asterisk are mandatory):
-
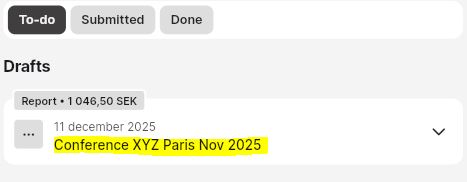
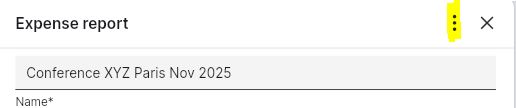
Name: erase the name that is created by the system, write a new one, e.g. “Conference XXX in Paris Nov 2025”
-
Description: here you enter some more information about the report, e.g. why you needed to travel.
-
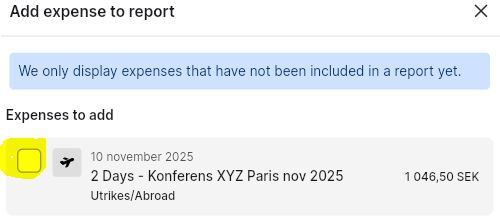
Add expense to report: here you can select previously registered expenses, mileage and/or per diem that are related to your trip, here is an example:
-
Purpose: select from the dropdown list.
-
School: This shows which school you work at (can be changed if necessary, for example, if you have two active positions at different schools).
-
Save: press if you want to save your expense report as preliminary.
-
Submit: press if you want to send your expense report for review/approval.
Other functions on the dashboard
On the dashboard, you will now see your expense report under “To-do” - “Draft” (if you only saved it as preliminary) or under “Submitted” (if you submitted it for review/approval):
Tip: you can submit your report by swiping right:
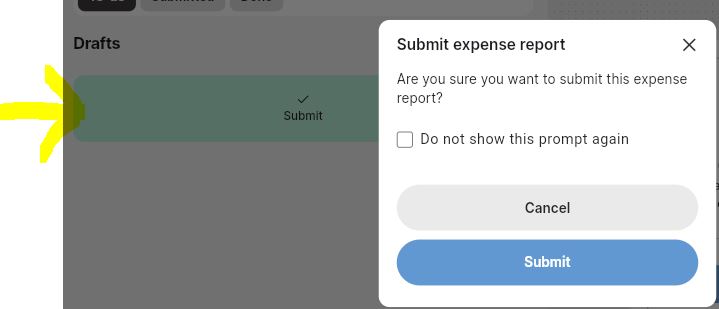
If you swipe left, you can delete your report instead.
You can preview your report by tapping the name, which will open the report. You can see a summary of your report by tapping the three dots on the right:
Then press “Preview PDF report”:
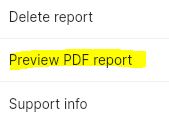
You can also delete the report by pressing “Delete report”, then the transactions will be moved back to “Drafts”.
Once you have submitted your expense report for review/approval, it will be oved to the “Submitted” folder:
When your expense report is approved by your manager, you will receive an email from noreplyHogiaOpenHR@hogia.se. Your report will be moved to the “Done” folder.