
Editing video in KTH Play
Since the editing functions in Kaltura are very limited, the software is suitable for use on shorter video segments that don't need continuous updating. The functions included let you remove unwanted pauses, add closed captions, edit metadata, split into chapters and get editing help from your coworkers. Here, you can read about the editing possibilities in KTH Play.
Finding the editor in KTH Play
- Click on your name in the upper right corner of KTH Play and select "My Media".
- Find the media you want to edit in the list of your media files.
- Click on the pencil icon on the right-hand side of the screen to edit the media.
Edit video tracks
Important! Always save a copy of the video and edit the copy instead of the original!
By clicking on "Launch Editor" you will open the KTH Play video editor, where you can edit the actual video track. You can make simple edits here, such as cutting the video and fade in or out. The video below shows you how to do this.
Time stamps
- 00:12 - Introducing functions
- 00:42 - Find the video editor in KTH Play
- 01:07 - The video editor, creating a copy
- 01:24 - Navigating the editor, removing the beginning and end of the video
- 01:52 - Cut and delete part of the video
- 02:17 - "Fade in", "Fade out"
Tab menu for video information
There are several different tabs in the editor, which you can find under the video you are editing.
The tabs will be explained in detail further down on this page.
- Details
- Options
- Collaboration
- Thumbnail
- Download
- Captions
- Attachments
- Timeline
- Replace Media.
For editing, the most important tags are “Timeline” and “Caption”.
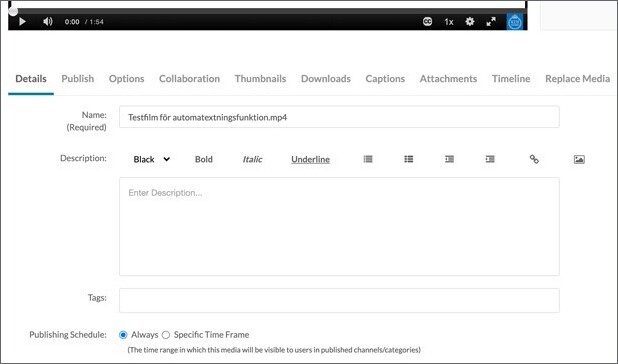
Details
This is the tab you will start on, and is the only place where you can save your video (by pressing “Save”) or exit the editor (by clicking “Go back to media”)
In this tab, you can edit:
- Name
- Description
- Tags.
The only mandatory field to be completed in the name, but both the description and the tags are helpful for finding the video later on.
Options
Under options you can choose if other people are allowed to use parts of your video, for example, if they want to use a part of a more extensive lecture. You can only choose between giving access to everyone or to no one.
Collaboration
The owner of the video can be changed under collaboration. You can also add and manage collaborators. You could, for example, do this if you want to add a teacher assistant to help you write captions for your video or if you want to give all of the course teachers access to the video.
This tab is hidden for you if you are added as a collaborator to the video. Only the owner of the video can see the tab.
Thumbnail
The photo that is visible before the video starts is called a thumbnail. You can choose the picture from the video or your computer. If you don’t choose a thumbnail, a picture from the beginning of the video will be shown. A thumbnail can only be changed, not deleted.
Download
The download settings you can choose between are if your video can be downloaded by the viewers and the sizes they can choose from if they download it.
Note: If you have several video tracks in the same upload (for example, if you have recorded both your screen and webcam simultaneously) only one of them will be able to be downloaded, and it is not possible to change which one. E-learning recommends you to only use one video track per video because of this.
Captions
The caption tab shows you the available captions (if there are any), their types and settings. You can also upload new captions from your computer or edit captions that have already been uploaded.;
You may order machine-generated captions in KTH Play (via the Reach Module)
For more information, read about How to caption in KTH Play
Attachments
The downloadable attachments to the video are shown under attachments, if there are any. Some examples of good attachments: the PowerPoint slides that are used in the presentation, data for laborations or a text version of the video.
When files are uploaded, you will have an option to write a title and a description of the file that will be visible in this tab. The filename will also be visible.
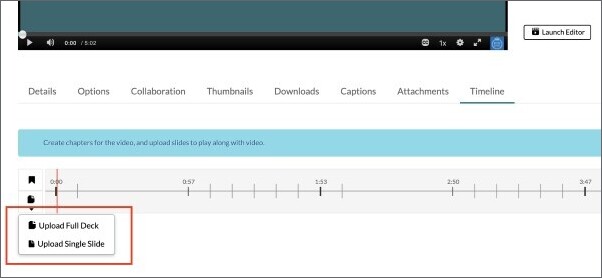
Timeline
The timeline is a way for you to add more information at specific times in your video. You can add slides and chapters in your video by clicking the buttons "Create new chapter" and "Upload slides deck" down to the left in the timeline. Both the slides and the chapters can have titles, descriptions and tags.
Slides are images you upload and show at the same time as the video. Note: The slides will always be seen until you change them to a new slide. If you want to make sure that the students won’t get distracted by a slide for too long, you can add a neutral image after a while. This could be, for example, the KTH logo.
The viewer can change between different viewing alternatives of the slides during the video. The settings are:
- Side-by-side
- Picture in picture
- Single view - change between showing either the slides or the video by clicking “Toggle view”.
The slides can be uploaded one by one or as a bundle with the function “upload full deck”.
Chapters are clickable timestamps that are especially useful in longer videos or to highlight a change of focus in the video.
Exactly how slides and chapters are shown to the user depends on their settings.
Read more about the interactive player in Kaltura Knowledge Center .
Replace Media
The replace media tab makes it possible for you to upload new versions of the video without redoing the captions, chapters, PDF uploads, etc. The old video is deleted, and the new video you upload will replace it.
Note: Be careful if you have settings that depend on the timeline, such as texting and chapters, and then change the length or order of cuts in the video. The time markings will be the same as they were in the original video, so you might have to edit chapters, captions, etc