
Create available appointments with appointment groups
In Canvas' calendar, you as a teacher can create "appointment groups" for your students to reserve appointments with you, either individually or in groups. Students can reserve one or more of the appointment times with you in their calendars. Individual meetings with students can be practical for project work, follow-up of longer tasks, digital "office meetings" and similar meetings.
Create available appointments
In the Canvas' calendar, you as a teacher can create a so-called "appointment group", which is a group of appointments that your students can reserve.
Check availability
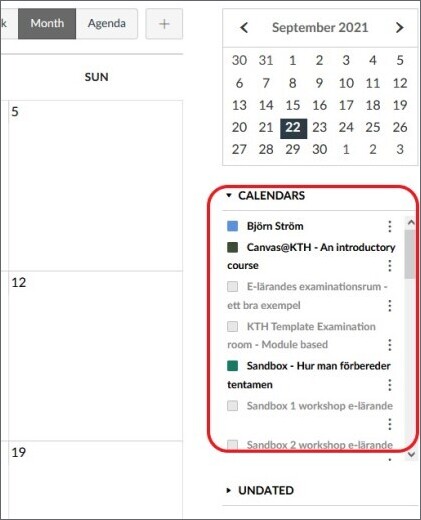
Before you start creating available appointments in an appointment group, we recommend using the calendar to avoid double bookings. Make sure that the course you create the appointments for is visible in the calendar, which you can see if the box in front of the name is checked under "Calendars".
Canvas calendar can show several courses at the same time. If you think that other courses may clash with the appointments you intend to create, it may be a good idea to make them visible as well.
Note! The courses that are visible in the calendar are the ones you can choose from when you create your appointments.
Create a new appointment group
To create a new appointment group:
- Click on the plus sign ("Create new event") that you find to the right above the calendar, or click directly in the calendar on the day you want the appointments to be created.
- Select the "Appointment Group" tab in the box that opens.
- Fill in the following information:
- Name, place and details for the appointment group.
- In which calendar, or calendars, the appointment group is to be displayed. Each course and section has its own calendar. If the calendar you want to use is missing you need to make it visible in the calendar, which is explained under the heading "Check availability" earlier on this page.
- If the students have to sign up as a group or by themselves. Read more about groups in Canvas .
- Date and time interval for each appointment. You can also select a longer time interval and let Canvas divide the interval into shorter, equally long time intervals.
- If there is to be a limited number of participants, or groups, per appointment.
- If the students get to see who signed up for available appointments, but not who is signed up for filled appointments. Students comments will also be visible to other students with this setting.
- If students are allowed to reserve a limited number of appointments.
- When you are done, press the "Publish" button.
If you are to have the appointments online, you should add the URL to the digital meeting in the Place field.
Note! Inform your students if you have a deadline to change a reservation. Canvas allows students to reserve time and cancel reservations at any time.
Edit and delete meeting times
After creating an appointment group, you can:
- Delete individual appointments.
- Delete the entire appointment group.
- Edit the appointment groups options and times.
Delete individual appointments
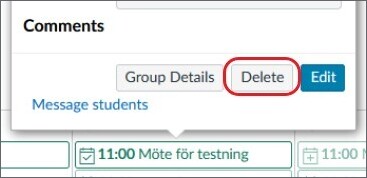
To delete individual appointments, click on the ones you want to delete, double-check that you chose the correct time and select "Delete".
You can click on the appointment in all views, and deleting individual appointments does not affect the rest.
Delete the entire appointment group

To delete all appointments at once, click on any appointment and select "Group Details". You will now end up on the edit page for the appointment group, and at the top of the page is the "Delete group" button. Click the button to delete the whole group.
Warning: The group will be deleted immediately without confirmation from you, even if students already have reserved appointments.
Edit the appointment groups options and times
Almost all options for appointment groups can be edited afterward. The only exceptions are whether it is a group assignment or not, and which groups that will be used when the students book an appointment.
To open the editing page, click on any appointment in the appointment group and select "Group details".
Now you can, for example:
- Change or add calendar/course.
- Add more time slots, just like when you created the appointment group.
- Fill in information.
- Limit how students can reserve appointments.
- Notify students who have not reserved appointments, or those who have.
Remember to save when you are done.
Note! Shifting all appointments or moving them to another day is not possible. Instead, you need to add the correct time slots and delete the incorrect ones one by one, or delete the entire appointment group and recreate it correctly.