Advanced option in Medvind
Here managers can find instructions on how to filter in Medvind to view only direct reported employees in KTH-HR. This guide is intended for managers who oversee other managers.
What does it mean to filter for viewing direct reports?
By filtering to view your direct reports, you can more easily monitor and approve leave requests, track absences, and handle approve (attest) at the end of the month.
Contact HR at your school or the administrative support team if you need assistance with the setup.
The "My Favorites" function
If you work with several different types of selections, the "My Favorites" function is a great way to make it easier to switch between your preferred selections.
Advanced option step by step
1. Start by clicking on “Self-Reporting” followed by” Start”

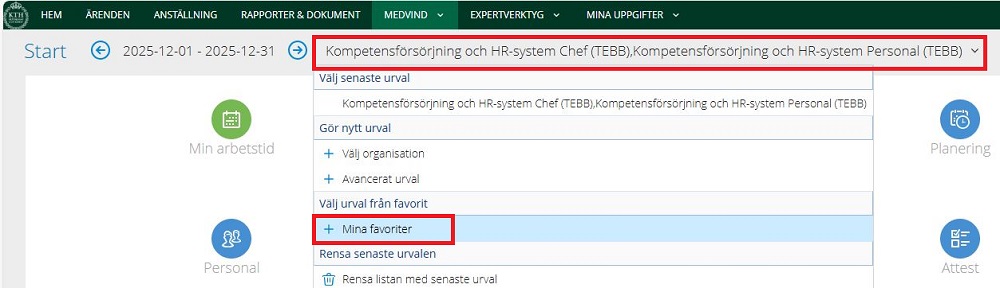
2. There is a preselected organization; it’s usually the one that you belong to. Click on it, in this case “Kompetensförsörjning och HR-system”. Click on” My favorites”.
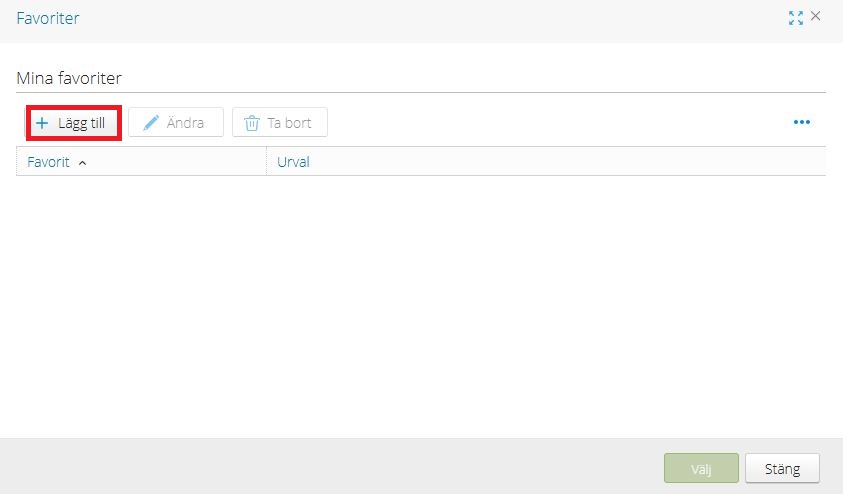
3. It then appears a new window, click on “add”
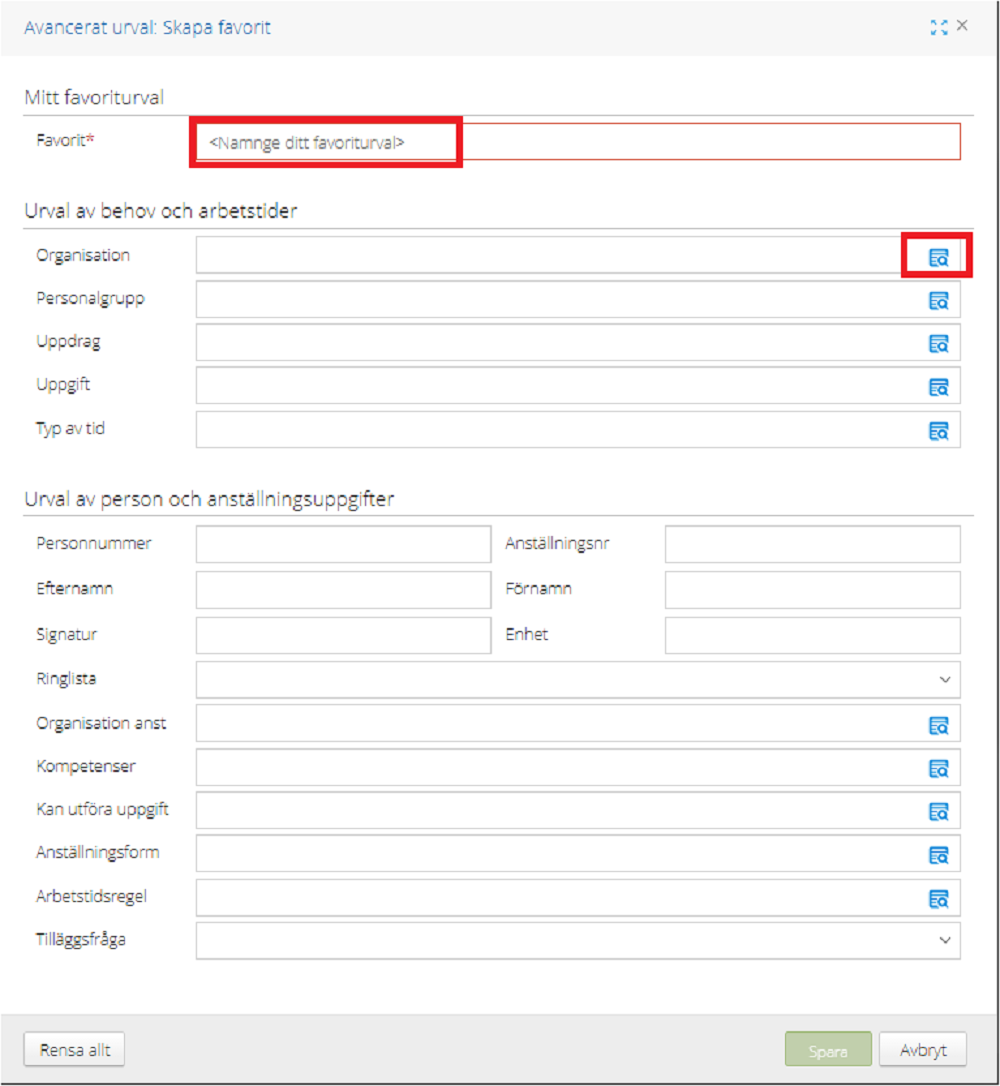
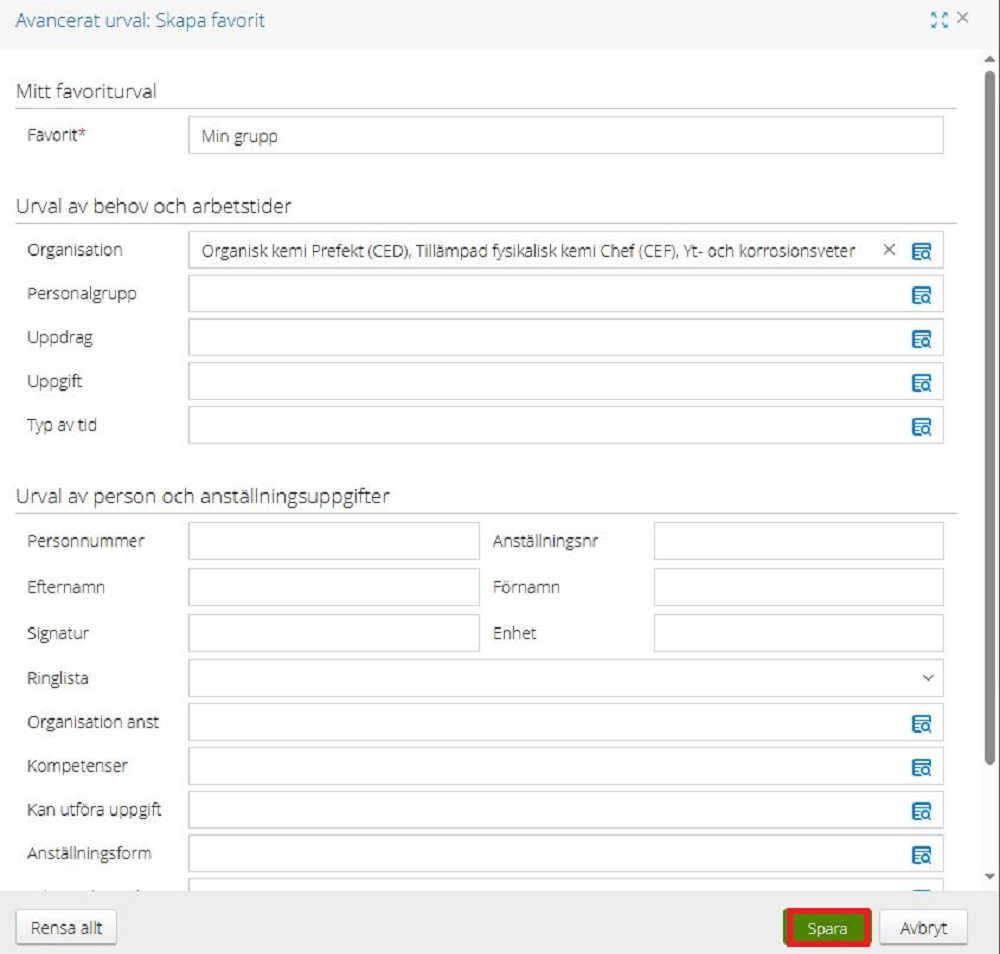
4. It then appears a new window. Name your selection in the “favorite” field. Then click on the blue symbol on the row for “Organization”
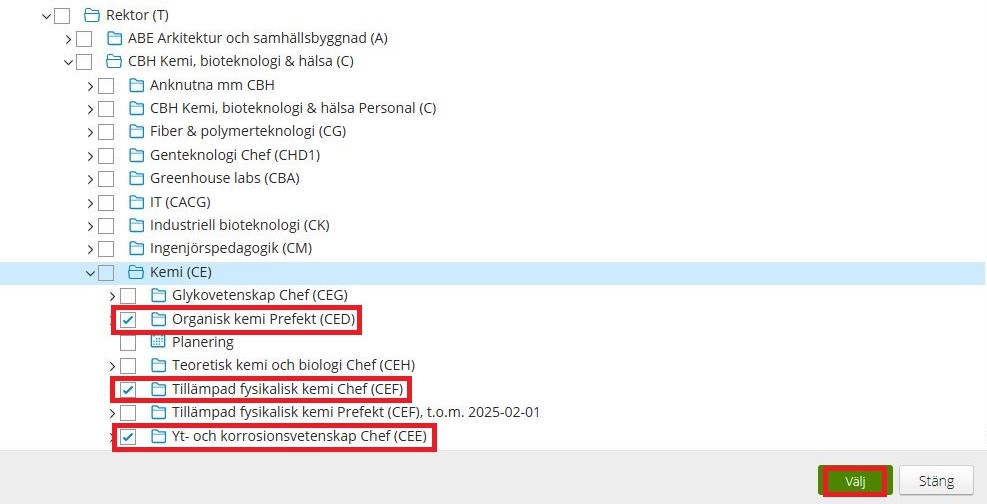
5. It appears a window where you can navigate yourself in the organization tree. Note that, depending on your access rights and role, you may see varying levels of the organisational tree in the system. In the example I want to add three different departments from Chemistry (Kemi). When you’ve made your choices, click on “select”. (The organization tree is in Swedish)
6. Now you will return to the view “Create favourite”, click on “save”.
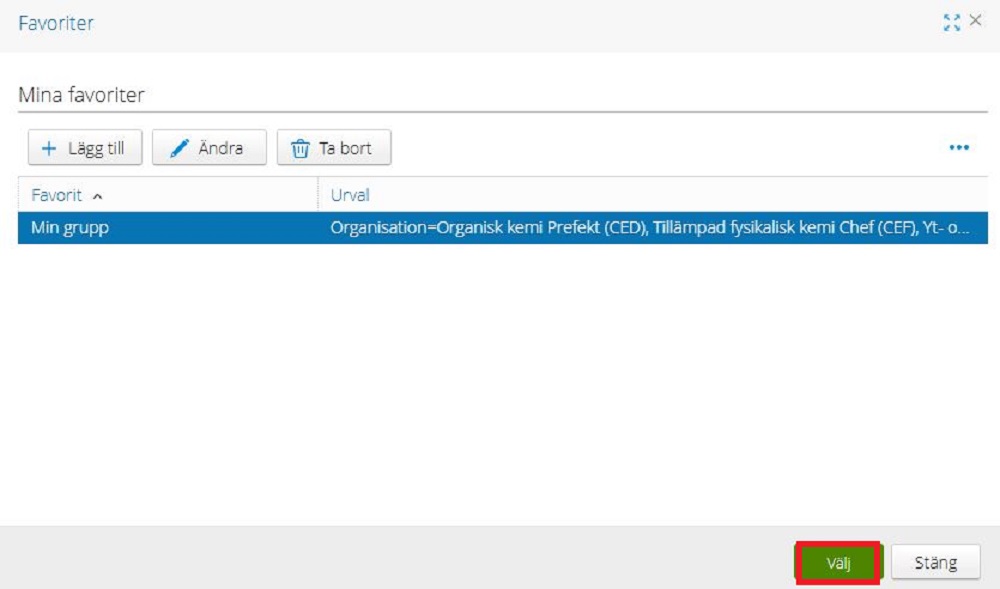
7. After clicking “Save” your selection will be saved under “My favorites”. By marking your favorite and clicking on “Select” the system will show the selection that you made.
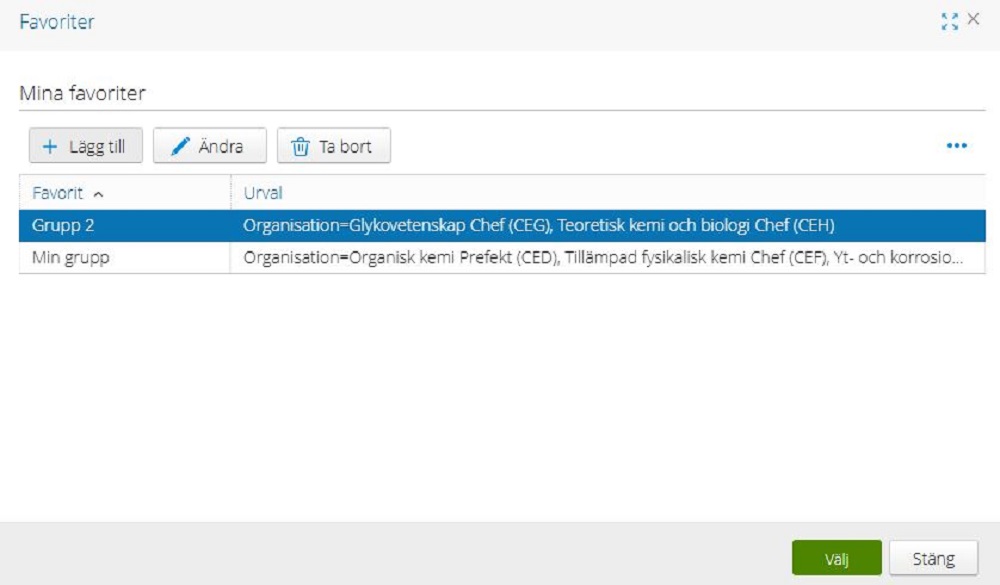
8. You can have multiple favorite groups. If there is anything that you need to adjust to your favorite group, you can click on “Edit”. If you want to remove your favorite group, you can click on “Remove”.
Make an advanced selection without creating a favorite
There is also the option to make an advanced selection without creating a favorite.
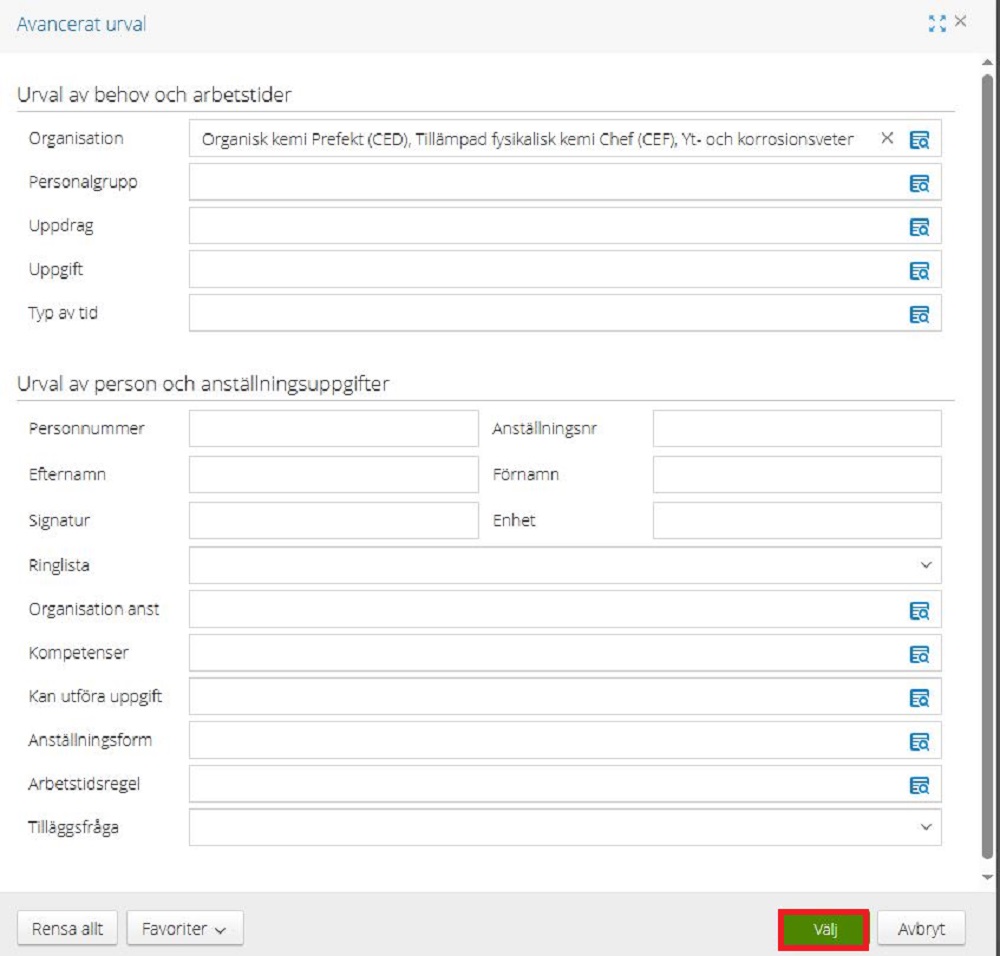
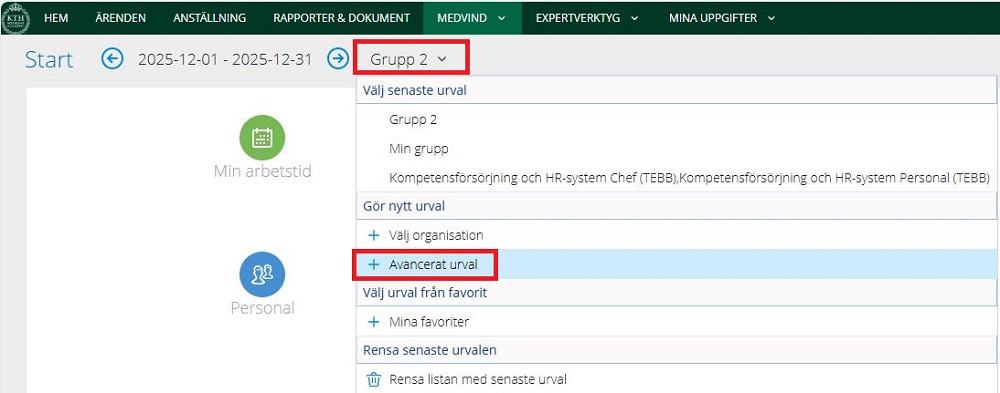
1. Click on the organization, in the example” Grupp 2”, click on” Advanced selection”.
2. Then you click on the blue symbol on the organization row.
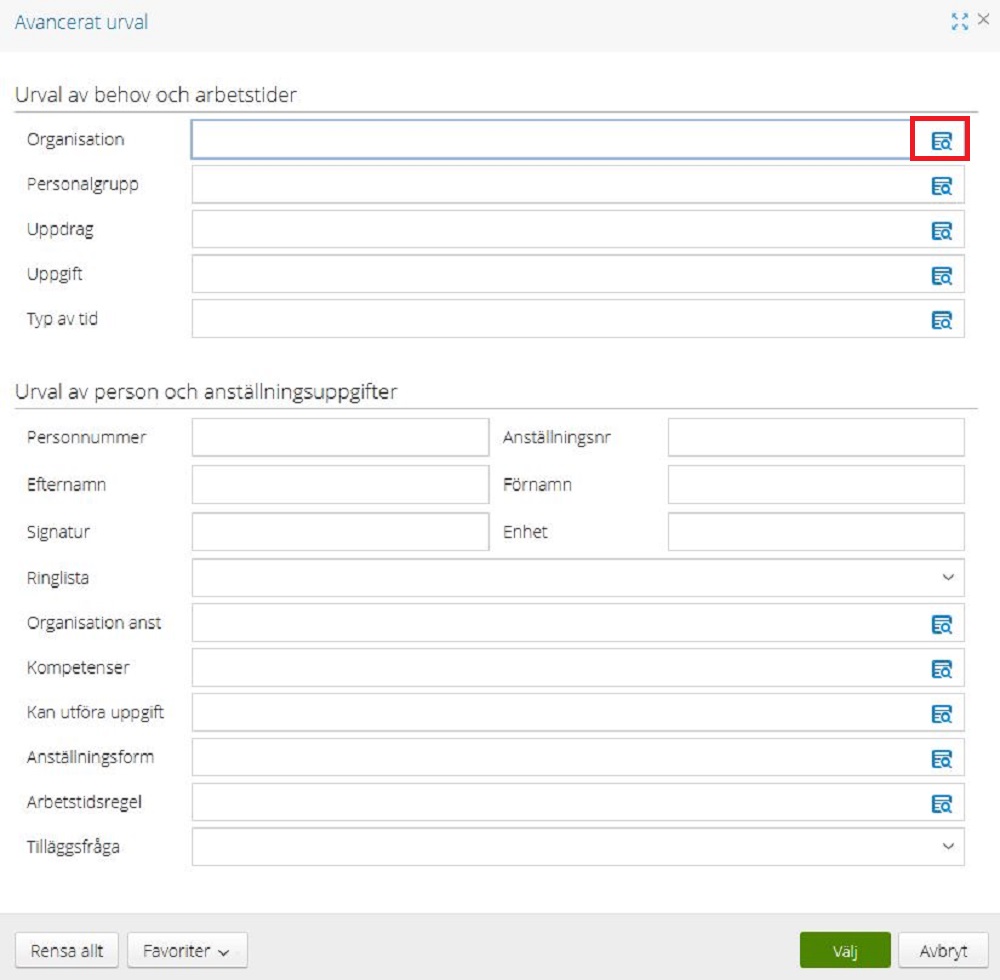
3. It appears a window where you can navigate yourself in the organization tree. Note that, depending on your access rights and role, you may see varying levels of the organisational tree in the system. In the example I want to add three different departments from Chemistry (Kemi). When you’ve made your choices, click on “select”. (The organization tree is in Swedish)

4. Now you will return to the view “Advanced selection”, click on “select”.