
Settings for examining assignments
By following this guide, you can create an assignment with good settings that make the examination easier to handle. You learn what information should be available for the students, which settings are suitable for managing the results of the assignment and how to set up plagiarism review and anonymous assessment.
Create a assignment in Canvas
Go to "Assignments" in the course menu (the left navigation menu).
Press the button at the top right: "+ Assignment".

Now you have created an assignment that needs to be fixed with settings that suits your examination.
Settings for the assignment
The following settings are possible for an assignment. Under the headings below, a recommendation is given for how they should be set when the assignment is created for examination.
- Information to students
- Handle the assignment results
- Control submissions
- Working method and review
- Anonymous grading
- Assign
1. Information to students
The assignment needs a name and an explanatory text.
Assignment name
Choose a name for the assignment so that the students can understand what assignment it is. For example: “Submission of examination assignment, course name, exam date” or “Question 1, submit solution”
Assignment information to students
You can enter information about the students' assignment directly. You can also add a file to the assignment. What you write here will be clearly shown to the students, but only when the assignment is available for them.
Regardless if you choose to present the exam wording in a quiz, a file or directly in the assignment, be clear in informing the students about where they find the information and what the students must upload for the submission to be correct. For example: "Here you should upload a pdf of your scanned solution of task one, the question that was assigned to you in the quiz with the name ...". If the assignment will be checked for plagiarism, inform about it.
2. Handle the assignment results
These settings are used to communicate the grade to students, and can also be used in weighing assignments against each other.
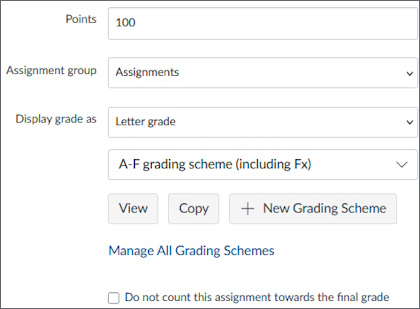
Points
Shows what the entire assignment to be submitted is worth. If you use Canvas for weighing several assignments together, this score should reflect how important the assignment is compared to others.
Assignment group
Optional group. Is mainly a function for weighing together the results of assignments in Canvas but can also be used to make the page "Assignments" clearer for the students when it is used instead of modules. Read more about weighting assignments in Canvas.
Display grade as
To use the KTH Transfer to Ladok function and transfer the assessments to Ladok, "Letter grade" needs to be used. Set the grading scheme to "A-F grading scheme (including Fx)" or "Pass/fail grading scheme 80%", depending on the grades used for the Ladok module. You can also create your own grading scheme. However, it must contain the same capital letters used in the assignment equivalent in Ladok for Transfer to Ladok to work. If you plan not to use a grading scheme or Transfer to Ladok, it is recommended that you select the simpler setting "Points". Learn more about grading schemes .
3. Control submissions
You have to specify what types of submissions you accept and how many attempts the students have to send in their submissions.
Submission types

Select Online, File Uploads and restrict to the type of files you want to receive (pdf is recommended). If students are to write in a text editor, you should allow other file types than if they are to write by hand and take photos of what they have written.
Inform the students in advance that only certain file types work. Students need this information so that they can verify that they have programs that can save the expected file type. As a suggestion for text editing software, you can allow pdf, doc, docx, odt, txt and rtf. If the students are going to take photos, you can allow pdf, jpg, jpeg and png. Select files that you want to work with when assessing. Canvas SpeedGrader works best with pdf files.
Submission attempts
Select “Limited” and then 1 in the field for the number of attempts, so it will be clear what document is to be assessed.
4. Working method and review
These settings are only to be used when needed.

Plagiarism review
Choose “None” if the submitted file will be scanned, or “Ouriginal” for computer written text. Make sure that “Show report to students” is set to “Never”.
Group assignment
Leave unchecked. Only check if the assignment should be solved and handed in jointly by a group of students.
Peer reviews
Leave unchecked. Only check if the assessment is intended for peer review.
5. Anonymous grading
Anonymous assessment is recommended to be used when it is possible to do so.
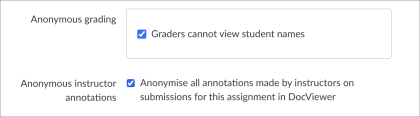
Anonymous grading
Check the box for "Graders cannot view student names" to activate the function for anonymous assessment. If you choose to activate the function, the students' results will be completely anonymous, both in the Gradebook and in SpeedGrader.
Read more about this on the page How to assess anonymously in Canvas .
Anonymous instructor annotations
Check the box. This will ensure that students won’t see who has made annotations in their assignment. It is important to set this before assessment starts, since it is not possible to anonymise annotations after they have been made. Note that this setting only applies to the annotations made in the students' submitted documents, not for Assignment comments.
The setting is recommended as some teachers and assistants have been contacted privately to be asked to explain their assessment. If a student wishes to find out who has assessed which assignment, KTH's usual routine for handling examination questions is recommended to be used.
Note! If you do not see the setting, you need to activate it in the course settings. Go to the "Feature Options" tab and find the line "Anonymous instructor annotations". To activate the setting, click on the symbol in the "State" column of the function. If a green tick is displayed, the function is activated.
6. Assign
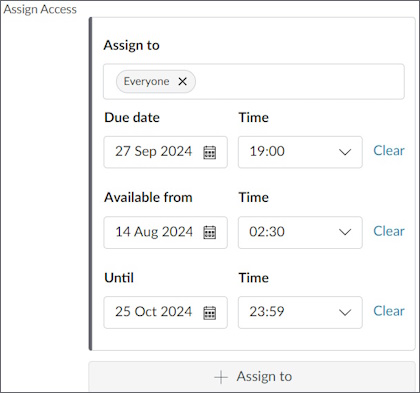
Adjust the publication date and time to suit your exam.
Assign to: Select the students for whom the submission times should apply. You can choose all, different sections and different individuals. You can create several different assign settings for the same assignment using "+ Add".
Due date: set to the end time of the examination.
Available from: set to the time when the students will first see the content of the assignment. They will see the title when the assignment is published but not the content.
Available until: set so that the assignment is visible half an hour longer than the submission date in case of any technical problems. You will clearly see in the assessment overview who submitted after the end time in the “Due” field.
Read more about Availability period and due date .
7. Save
Press the "Save" button at the bottom to save the assignment and its settings.
8. Prepare assessment with rubrics and outcomes, if applicable
Once the assignment has been saved, you can choose to add a rubric of outcomes for assessment and feedback. This enables you to assess the assignment directly linked to the outcomes in both a formative or a summative way. This is optional, SpeedGrader and the assessment works well without a rubric of outcomes.
Read more about The Outcomes function in Canvas .
Publish the assignment
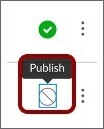
Check that the assignment is published and publish it if it is not by pressing on the symbol for unpublished. Students will see that the assignment is available and its title when it is published. They will first see the content of the task at the time of "Available from".
When the assignment has been created and published, it must be placed where students can easily find it. The recommendation is that you preferably use modules or that you have the page for all assignments published. Read more about how modules work .
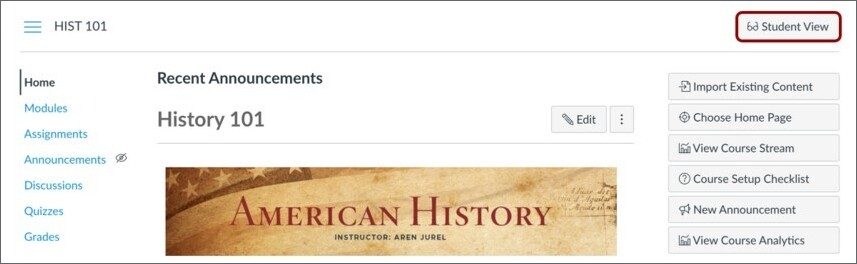
Use "Student view" and double check that the assignment is really visible and locked. On the "Home" page, press on the "View as student" button to view the course as a student.
Reuse an assignment's settings
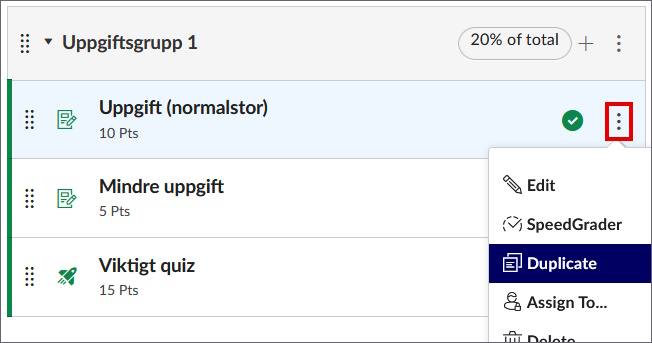
You can copy an already created assignment to save time by only having to make the settings once. Create an assignment with the settings that suit your exam. Then copy that task by pressing the three points for the task in question, select "Duplicate". Name the copy with its own appropriate name and check that all settings have been transferred correctly.
Organize your assignment or quiz
How you choose and organize your assignments or quizzes for your examination depends on how you want to carry out the assessment work and handle the examination after the students have submitted it.
Organize assignments/quizzes for examination