This page explains how to assess uploaded or scanned documents in an assignment in Canvas. SpeedGrader has many flexible features similar to a traditional assessment made by hand, such as annotations directly in the document, and comments. Read here for more information about it and other things related to the assessment of documents in SpeedGrader.
Do you want to assess anonymous proctored exams in SpeedGrader?
Note that this page is about how to practically use SpeedGrader's built-in grading tools. If you are unsure how to handle anonymous proctored exams, this is explained in more detail on the page
How to assess anonymously in Canvas
.
Structure of the guide
The guide is divided into four parts:
Before you start.
Find student submissions.
Grade and give feedback.
How to annotate and comment on documents.
How to assign a grade.
How to comment on the entire submission.
Post the grades when you're done.
Particularly interesting for scanned documents is the annotation and comment feature in SpeedGrader, which is comparable to how many teachers work with handwritten exams.
Scanned exams to Canvas
Do you want to use a campus-based proctored exam but avoid dealing with the large piles of paper afterwards by doing the grading work in Canvas SpeedGrader? In the examination room for the exam, you can easily choose to import the students' writing as submissions in a Canvas Assignment using the KTH Import Exams function.
When grading anonymously, check that the assignment is anonymized or hide the students' names only in SpeedGrader. If you have imported scanned anonymous written exams, the assignment will automatically be anonymised.
In SpeedGrader, the student's submission is displayed in the main window and the student's name is displayed in the information field, in the upper right corner. If the assignment is anonymized the students' names are replaced with an alias, "Student X", where X is a number. You will also find information about the submission and possible grades in the sidebar.
How to switch students
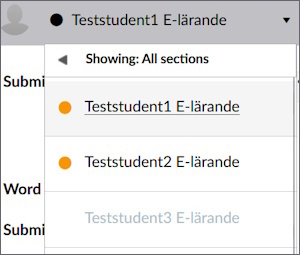
Dropdown list of students in SpeedGrader. Two have an orange circle by their name.
Press the student's name to open the drop-down list of students. Students are listed alphabetically by last name, except if you anonymized SpeedGrader. Anonymized students are placed in a random order where the first student in the list is called "Student 1", the second "Student 2" and so on.
Student names are marked with an orange circle if they have a submission that has not yet been graded.
How to check previous submissions, if available and needed
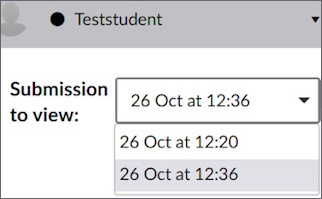
First in the sidebar is the date and time when the student submitted the assignment. If the submission was received after the due date, it will be marked "late". If the student has only made one submission, the date and time are shown as text. If the student has made several submissions, you will see a drop-down menu where you can select the submission you want to manage.
SpeedGrader always shows the latest submission unless you manually switch to an earlier submission. If you switch to an earlier submission, you will also be warned that you are not on the latest submission.
Most of the time only one submission is needed as multiple files can be uploaded in the same submission, but in some cases there is value in allowing multiple submissions. For example, to receive and provide feedback on all drafts of an essay in the same assignment.
How to choose the right file, if there are several
If students have uploaded multiple files at the same time, you can see them under "Sent Files" in the sidebar. Scanned documents are also visible here, as they count as uploaded files. The file you select appears in the main window. You can also choose to download the files.
Tip! If you wish to compare two students' submissions at the same time, you can open Canvas in several tabs or browser windows.
3. Grade and give feedback
SpeedGrader has several ways to grade and give feedback.
How to annotate and comment on documents
In SpeedGrader, you can annotate and comment directly in the document with the annotation tool. Canvas can also handle several teachers annotating at the same time in the same submission. These annotations are only visible to the student after you publish a grade. A grade can be in the form of points, a letter grade, or a comment in the SpeedGrader sidebar.
You will find the annotation tool in the main window, as part of the navigation menu for the student's submission. There are several types of annotations to choose from.
Point annotation: mark the document with a point and add a comment.
Highlight annotation: highlight a word or sentence and add a comment.
Free text annotation: add a comment anywhere in the document instead of at the side of the document.
Strikeout annotation: choose text to strike out with a line and add a comment.
Free Draw annotation: draw freely with the mouse pointer and add a comment.
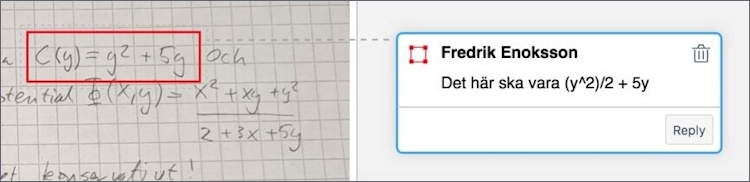
Area annotation: highlight a specific area in the document and add a comment.
An example of area annotation where an area has been highlighted and a comment has been added.
With anonymous instructor annotations, students do not see the name of the person who made annotations in their assignment. KTH recommends this approach because teachers and assistants have sometimes been contacted privately and asked to explain why they graded the way they did. A student must use KTH's usual routine for handling exam questions if they want to find out who assessed which assignment.
It is important that this setting is turned on before you start grading, because it is not possible to anonymize annotations afterwards. Note that the setting only applies to annotations in students' submitted documents using the annotation tool, not to "Assignment comments".
Note! The setting must be made both in the Canvas room and in the assignment to be graded. If you don't see the setting when you create an assignment, you need to do the following steps:
Go to "Settings" in the course menu and enter the "Feature Options" tab.
Find the line "Anonymous instructor annotations".
Press the symbol in the "State" column of the function to activate the setting.
How to assign a grade
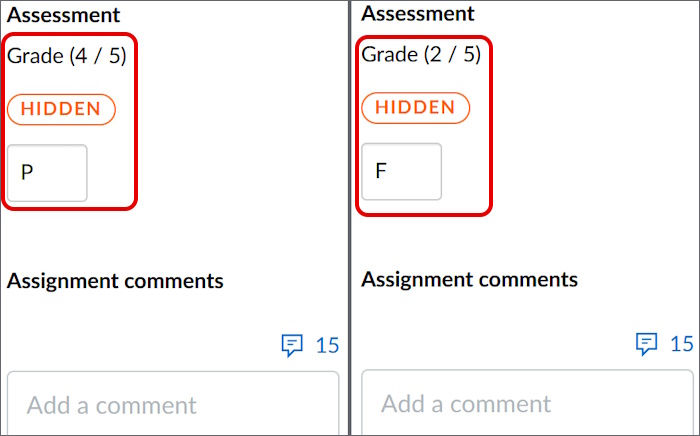
In SpeedGrader, you can assign a grade or points in the sidebar under the heading “Assessment”. Enter the student's results in the box and press enter or click outside the box to update the grade. You can enter points, a percentage value, or a letter grade, depending on the assignment setting.
If the assignment shows the grade as a letter grade, the points you entered will change according to the grading scheme for the assignment. You will still see the points and the maximum points above the field even if it has been changed to, for example, a letter.
Example of an assignment with the grade scale fail (F) (0, 1, 2 or 3 out of 5) and passed (P) (4 or 5 out of 5).
Do you want to grade with outcomes?
If you create learning outcomes for an assignment, you can grade it with a grading rubric in SpeedGrader. You press the button "View rubric", which will be in the sidebar. However, the rubric can only be used by one teacher at a time. Read more on the page
Grading with outcomes in SpeedGrader
.
How to comment on the entire submission
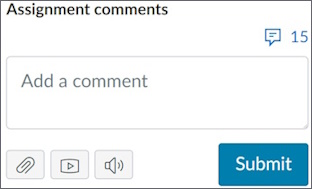
In the box under the heading "Assignment comments" you can write comments to the students. Any comments made by the students during the submission are also visible there. To add a comment to the assignment, type your text in the "Add a comment" text box. Both you and the students can attach files and media to their comments. You can also write comments at the same time as another teacher.
The comments are automatically saved as drafts if you leave SpeedGrader or change student without saving. The drafts are clearly marked as drafts and can easily be edited, saved or deleted.
Tip: Comment library
Above the comment field you will find the button for the comment library in SpeedGrader, where you can add and save comments that you want to be able to reuse. Treat the saved comments as templates in that you will be able to edit the comments before sending them. You can also edit the comments in the comments library after you have saved them there.
The comments library is connected to your account, which means that you will find your saved comments in all your courses.
4. Publish the grades when you're done
When you have finished grading for all students, you need to post the grades, annotations and comments for the students.
Note! You can only post grades if there is at least one assignment comment or points/letter grade. If you only grade with annotations or rubrics, you need to comment on at least one student's submission before you can post the annotations or rubric for all students. Usually, you can comment on the test student who is created when you use the Student view, so that no real student is affected.
Do the following to post the grades:
Go to SpeedGrader.
Press the button to post or hide grades (a crossed-out eye in the upper left corner).
Select “Post grades”.
In the menu that opens, select "Everyone" and press "Post".
Grades, annotations and comments are now visible for the students.