
Create and share an item bank
Here you can learn how to use item banks in New Quizzes. We will explain what an item bank is, how to create an item bank and add questions to it from a quiz or directly in the item bank. You can also learn how to share an item bank with other people or courses.
Create an item bank
There are several ways to create an item bank in New Quizzes and they are all about as easy. However, we recommend that you go the most flexible route, which is via "Manage Item Banks" in a New Quiz.
To create an item bank, follow these steps:
- Open a New Quiz of your choice.
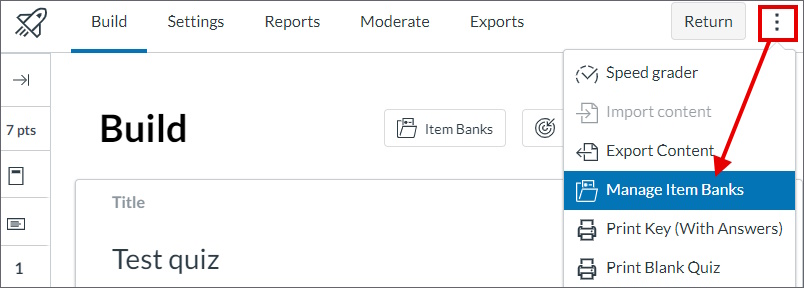
- Tap the button with three dots in the top right corner (called "More Quiz Actions").
- Select "Manage Item Banks" from the drop-down menu.
- You have now landed on a new page that lists the item banks you have access to. To create a new item bank, press the "+ Item Bank" button.
- Name your item bank in the dialog box that pops up. Choose a clear and unique name so it will be easy to find, for example, you can include the course name in the item bank's name.
- (Optional): Tick the box "Share with [name of course room]" if you want to let all teachers in the course room see and use the item bank.
- Press "Create Bank".
Your new item bank should now appear in the list! If you can't find it, search for the name you just gave it.
Add questions to item banks
There are two ways to add questions to an item bank. You can add a question from an existing quiz or create a new question directly in the item bank.
Add a question from a quiz
At the end of each quiz question, there is a button to add it to an item bank, so you can easily move questions from an existing quiz into an item bank.
To add a question to an item bank:
- Find the quiz question you want to add to an item bank or create a new question.
- Tap the question so it goes into edit mode.
- At the end of the options for the question, tap on "Item banking".
- Tap "Add to Bank".

- In the dialog box that opens, tap the drop-down menu and select the item bank in which you want to put the question. You can also choose to create a new item bank for the question, in which case you need to give the item bank a name.
- Press "Add".
Create a new question directly in the item bank
To create questions in an item bank, follow these steps:
- Go to "Manage Item Banks" (see the heading "Create an item bank" for instructions).
- Find the relevant item bank and tap the name of the item bank to open it.
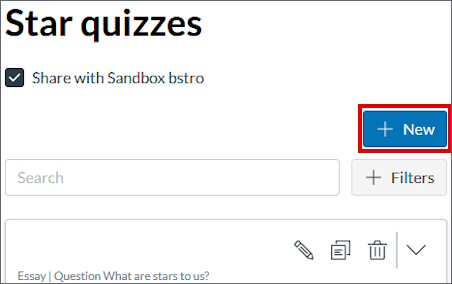
- Press the "+ New" button.
- Choose question type in the dialog box that opens.
- Fill in the details of the question just like you would when you create a question in a quiz.
Read more about different New Quizzes question types .
Share an item bank
New Quiz item banks are saved by the person who created it, unlike Classic Quiz which saves them in the course room where they were created. However, all item banks have a "Share" button that gives you the ability to share your item bank with other people and with courses. You may want to share an item bank, for example, if another colleague wants to see what your item bank contains, or to be able to edit the content together.
Tip! An effective way to share an item bank with all teachers in the same course is to share the item bank with the course instead of adding each teacher one by one. This gives access to the item bank to everyone with teacher roles in that course. However, students will not have access to the item bank.
To share an item bank, follow these steps:
- Go to any view of your item banks and find the item bank you want to share.
- Press the "Share" button next to the name of the item bank (the symbol of three dots connected by two lines).
- In the dialog box that opens, you can see who currently has access to the item bank, and you can also add new people or courses. Search for a course or person you'd like to share your item bank with and select them from the drop-down list.
- Set the access they should have to the item bank. You can choose between "Can view" and "Can edit".
- Tap "Add" to confirm your choice.
- Press "Done" to save and close the dialog box.
Only the owner of the item bank can edit the permissions or remove access to the item bank.
Note! Consider the name when sharing an item bank so your colleagues know where it comes from. We recommend that you start with the course name.
Using item banks
To read about how to use an item bank in a quiz, go to the pages: